Automation Templates
The Declarative Builder provides six powerful templates for automation, each designed for specific use cases:
Enhanced Error Handling
All Declarative Builder operations provide detailed error handling and logging that makes investigating potential issues easier than traditional Flow Builder.
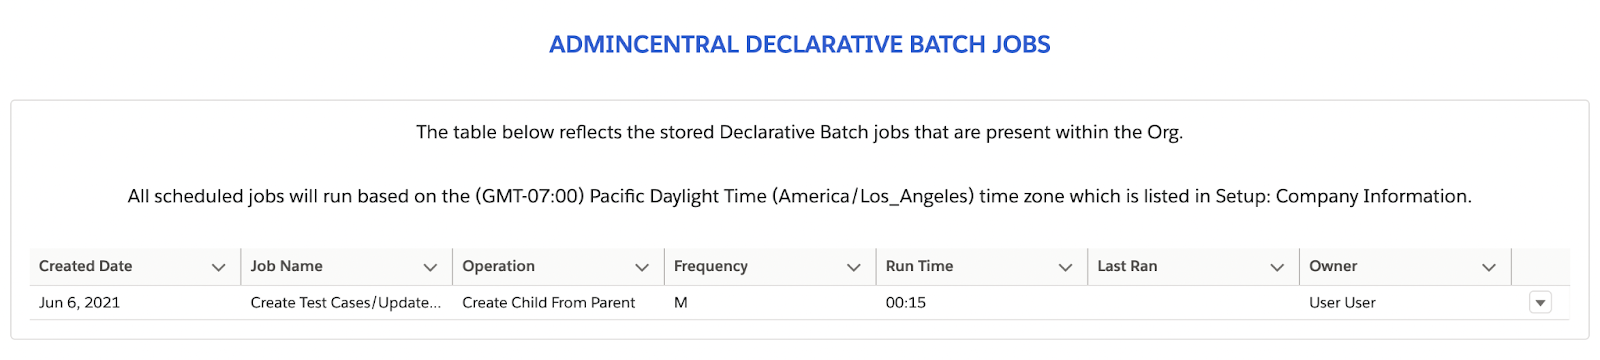
Builder Homepage
The datatable on the Declarative Builder homepage reflects all the scheduled Automations that are currently setup.
Data Table Information
Created Date
Reflects the date the Automation was created.
Job Name
Unique descriptive name given to the Automation during creation.
- Sunday: Su
- Monday: M
- Tuesday: Tu
- Wednesday: W
- Thursday: Th
- Friday: F
- Saturday: Sa
- Run Now will run the Automation, now -which is to say it will run the moment resourcing becomes available in your Org, regardless when the Automation is scheduled. If Run Now is selected, the Automation will still run at its regularly scheduled time.
- Clone will open a modal that will walk you through instructions to clone an existing automation.
- Edit will take you back into the Declarative Builder to edit your automation.
- Delete will delete the Automation
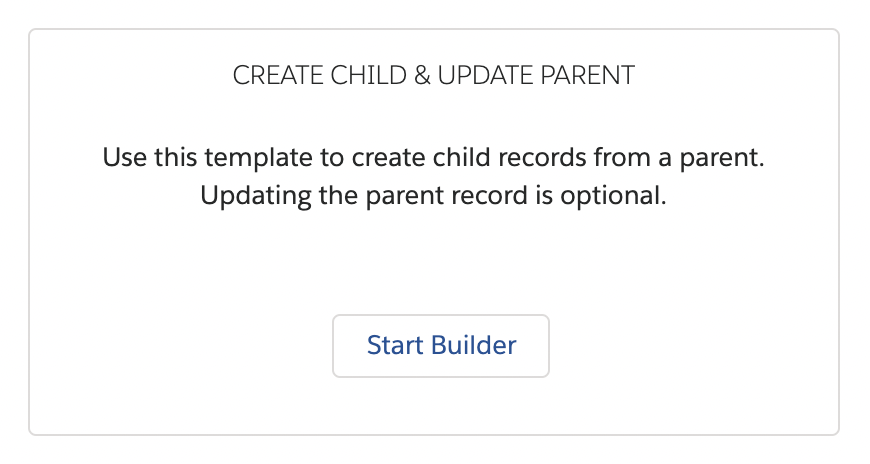
Create Child & Update Parent
The purpose of this Automation template is to take you through the process of setting up a batch job that would allow you to create a child record for a parent record, and optionally provide you the ability to update the parent record in the process.
- In the Create Unique Job Name section, enter a unique name for your Automation. Select a name that will make it easy for you to identify what the automation is doing, as this will be what appears in the datatable on the Declarative Batch builder home page. This step is required for every automation you setup -not just for Create Child & Update Parent.
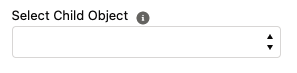
- In the Select Child Object section, select the Child Object to base the automation off of by typing the first few letters of the SObject name and selecting the correct name from the dropdown (both Standard as well as Custom Objects are supported).
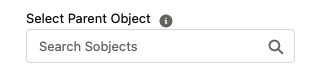
- Once a Child is selected, in the Select Parent Relationship section, select the Lookup and Master/Detail relationships on the Child Object will be displayed for the user to select to determine the Parent that will be updated from the Child:
- The next screen, the Create Child Records section will allow the user to input field values for the Child records that will be created (in this case, Case records). Any required fields on the object will be automatically populated to the screen and values must be entered before additional fields may be added. Fields values may be populated with a manually entered fixed value, or maybe populated with a value from a field on the Parent object.
- Once all the fields have been populated, click the disk icon to save the row. Please note that a new row may not be added until the previous row has been saved. Once the row is saved, the Edit icon will be displayed along with the Delete icon if the field is not required. Required fields may not be removed from the mapping. Additional details on the Mapper builder can be found in the Mapper Builder section of the Declarative Batch Builder documentation.
- Once the mappings are complete click Next to proceed to the Query Filter Logic and Field Update Mapper sections. This screen provides the ability to set criteria on a parent under which new Child records will be created. Please note, a max of 10 criteria may be entered. While this section is, technically, optionally; if values are not entered here to filter the parent records down; then every parent record will have a child record created against it.
- Finally, the Field Update Mapper provides the ability to update parent fields once the child records have been created. Select the field to be populated then the value to populate it with. Click Next when all fields to be populated have been completed.
- The final step is to set the recurring schedule for the job to run. Select Monthly or Weekly to get additional options to specify the day of the month or day(s) of the week, then the time it should run on the scheduled day(s). Click Save & Schedule to complete the wizard and be taken back to the Job List, where you will see your new job ready to run!

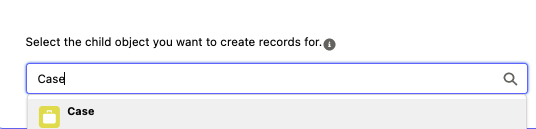 In the example above, the Case object is being selected as the Child to start.
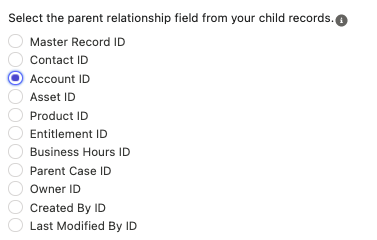
In the example above, the Account Id relationship has been selected, so the parent Account record for a Case will be updated. Once the relationship has been selected, Click Next to continue.

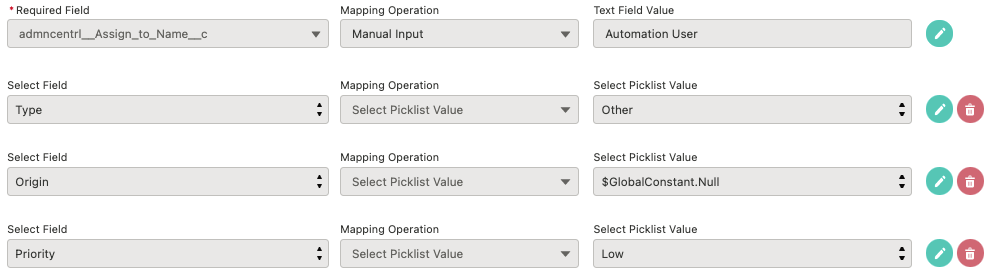
In our example, Case has a single text field that is required called "Assign To Name", which will be populated with the value of "Automation User" that was manually typed, when the new Case record is created. In the image above we show that you also have the option to select a value from the parent record that is creating the child. In our example, we evenutally settled on the manual input option and simply typed in the value of interest.
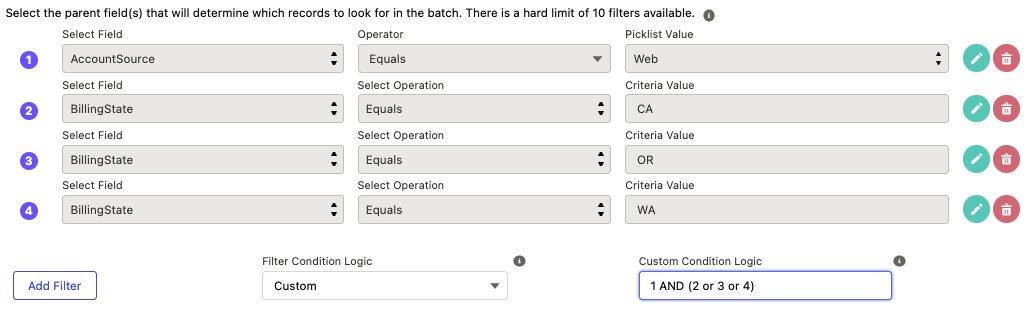
In our example, you can see that criteria on Account fields has been set: Where the AccountSource = 'Web' and the BillingState is "California" or "Oregon" or "Washington". The Filter Condition Logic field allows you to select All criteria (AND), Any criteria (OR), or Custom criteria which are specified in the Custom Condition Logic field.
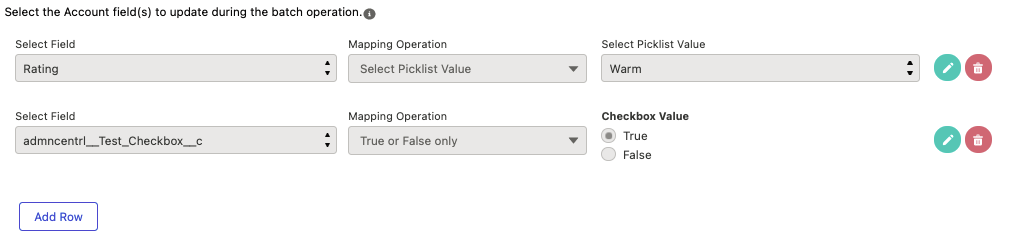
In our example, you can see a picklist field and a checkbox field being set.


In our final example, the process will run every Monday at 12:15am. Please note, the time selected is specific to the Company Time Zone which is listed in Setup -> Company Information.
RollUp Operation
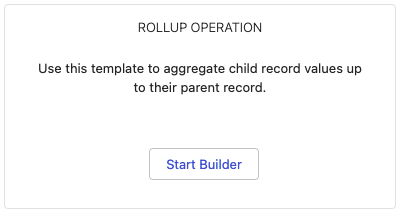
The purpose of this Automation template is to take you through the process of rolling up child record values up to their parent record. Native Salesforce® logic has this functionality present within RollUp Summary (RUS) fields, within a Master-Detail relationship. Since there is a limit to how many RUS fields you can have on an object, this Automation process provides a nice secondary alternative when you've hit that limit. In addition, this Automation template performs the same operation on Look-up fields as well.
To begin the RollUp Operation, click the Start Builder button on the corresponding panel as shown below:
- Begin by creating a unique job name for your Automation. This is a required step, because this name will be used to define the Automation you're about to create, within the data-table in the Declarative Builder start page. The job name should be descriptive enough to provide other Admins visiting the start page with context on what the Automation does.
- Next, in the Create Parent/Child Relationship section, select the parent object of the records you'd like to be updated in the Automation.
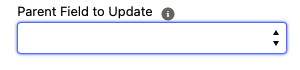
- Once you've selected the parent object, you will then be able to select the field available for updating. This field will be the parent field that will be updated by the aggregation operation. The selection of this field will determine what child object fields can be used to aggregate into this field; as well as what sort of aggregation operations this Automation can perform. For example, if you select a Date field here, then you will only be able to select Date fields in the selected child object (that comes later). And you will only be able to perform a MIN or MAX aggregation operation, and not an AVERAGE or SUM.
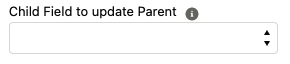
- Once you've selected the parent field for aggregation, you can now select the child object. The objects available in this picklist will be determined by those that have a look-up or master-detail relationship with the parent object you selected.
- Finally, to finish the Create Parent/Child Relationship section, select the child field you want the aggregation calculations to be performed from. As mentioned above, your options here will be limited to the parent field's data type you selected earlier.
- The Create Parent Filter is considered an optional section, however, it is highly recommended you use this section. The purpose here is for you to provide filters for the Automation to find the Parent records you'd like to have updated. If you do not create filters, then every record in that object will fall into that query, and will be updated. To learn more about what is involved in this section and how to properly configure your filters, reference the Filter Builder section (below).
-
Once you've completed the Build Operation & Query to Find Parent section, you'll be taken to the Build Query to Find Child section.
The objective here is to build out filter logic for the child records - in our example, we'd be setting filter logic for the Contact object to narrow the scope of the aggregation option to only a selected group of Contact records, instead of all of the Contact records associated with the parent.
This is an optional operation. Similar to the parent record query operation discussed prior to this section, if you do not introduce any filter logic here, then we will be querying all the related child records for the parent, and perform the aggregation operation off them. - Once you've completed the filters for the Build Query to Find Child section, or skipped it, you'll be taken to the Build Parent Update Operation page. The operations available to you vary depending on your select parent field's data type. In our example here, only the Count of Records option is available because the ID field was selected for the child object. When selecting the ID field, only a count of records can be performed.
-
The final section in this Automation template is the Schedule Your Job section. Your objective here is to schedule when you want your job to execute. Your options are:
-
Schedule to Run Monthly
- You will be presented with a picklist of values 1 to 31. Your selection will determine what day of the month your Automation will run. Standard Salesforce® functionality still applies here - meaning if you select to run on the 31st, and there aren't 31 days in the month, then the Automation will not run.
-
Schedule to Run Weekly
- You will be prompted with a series of weekday buttons, for you to designate on which day(s) of the week you'd like your Automation to run. If you'd like to have the Automation run every day, simply select each button that represents a day of the week.
-
Schedule to Run Monthly
- Once you've selected you've completed setting up the scheduling for your Automation, simply click Save & Schedule. You will be taken back to the Declarative Builder homepage, where your Automation will be present within the data-table.


In our example above, we selected to run the Automation weekly, and have selected the days from Sunday to Friday.
Whether you select to run monthly or weekly, you'll be presented with the Schedule Time section; where we present you with the DateTime -at the moment you selected the Monthly or Weekly option- to show you what date/time configuration your org is configured for - this is because the Automation operations will run in accordance to your Company Settings, not the User's timezone. In this example above, we can see that the User's Company settings are for Pacific Standard Time, even though the user is not in that timezone.
The Select Scheduled Run Time picklist will present you with a list of available time-slots for your Automation. Due to the potential record locking conflicts that can emerge from having multiple jobs running at the same time, we have the time-slots setup in 15 minute increments. Once a time-slot is selected, it is set only for the Automation you built - no other automation will have access to that slot until you delete the Automation.
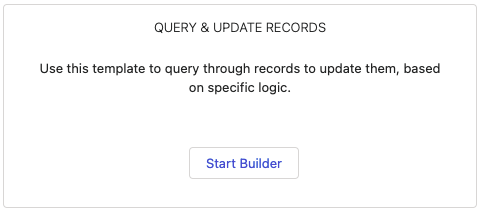
Query & Update Records
The purpose of this Automation template is to take you through the process of setting up a batch job that would allow you to query for records in a single object, and perform an update operation on the records that were returned.
To begin the Query & Update Builder Template, click the Start Builder button on the corresponding panel as shown below:
- Begin by creating a unique job name for your Automation. This is a required step, because this name will be used to define the Automation you're about to create, within the data-table in the Declarative Builder start page. The job name should be descriptive enough to provide other Admins visiting the start page with context on what the Automation does.
- In the Select Object section, select the object you want to query your records for the update operation.
-
Once you've selected the object you want to query against, you'll notice that the Add Filter and Add Row buttons will be ungrey in the Query Filter Logic section and Field Update Mapper section, respectively.
This Query Filter Logic section is where you build the filtering logic for the records in the object you've elected to query. Additional details on working with building filters can be found in the Filter Builder section below
The Field Update Mapper section is where you define what fields get updated with what value. All the records that are returned in your query will receive the updates you provide here. For additional details on working with building the mapping section, check out the Mapper Builder section below.
-
The final section in this Automation template is the Schedule Your Job section. Your objective here is to schedule when you want your job to execute. Your options are:
-
Schedule to Run Monthly
- You will be presented with a picklist of values 1 to 31. Your selection will determine what day of the month your Automation will run. Standard Salesforce® functionality still applies here - meaning if you select to run on the 31st, and there aren't 31 days in the month, then the Automation will not run.
-
Schedule to Run Weekly
- You will be prompted with a series of weekday buttons, for you to designate on which day(s) of the week you'd like your Automation to run. If you'd like to have the Automation run every day, simply select each button that represents a day of the week.
-
Schedule to Run Monthly


Whether you select to run monthly or weekly, you'll be presented with the Schedule Time section; where we present you with the DateTime -at the moment you selected the Monthly or Weekly option- to show you what date/time configuration your org is configured for - this is because the Automation operations will run in accordance to your Company Settings, not the User's timezone. In this example above, we can see that the User's Company settings are for Pacific Standard Time, even though the user is not in that timezone.
The Select Scheduled Run Time picklist will present you with a list of available time-slots for your Automation. Due to the potential record locking conflicts that can emerge from having multiple jobs running at the same time, we have the time-slots setup in 15 minute increments. Once a time-slot is selected, it is set only for the Automation you built - no other automation will have access to that slot until you delete the Automation.
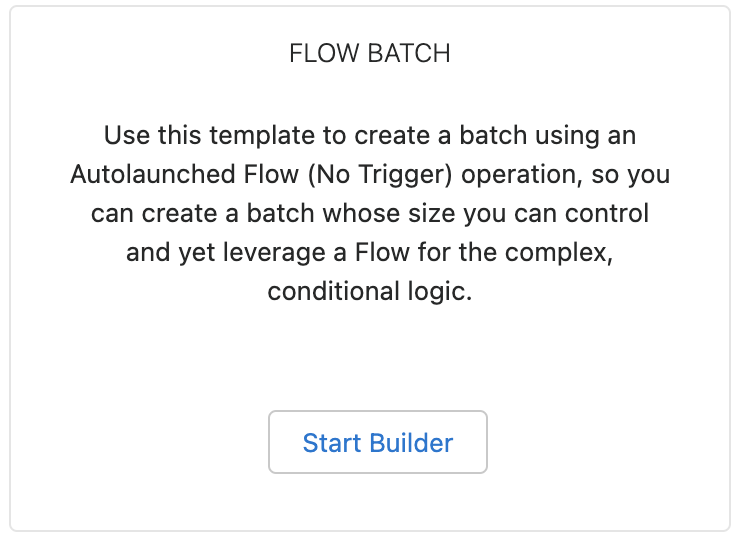
Flow Operation
The purpose of this Automation template is to help expand your control over your existing Flow operations. Salesforce® defaults scheduled Flows to run at 200 records per batch. With this operation, you'll be able to designate a particular Flow you'd like us along with setting the amount of records you'd prefer in the batch operation. This means your more complex operations that failed during traditional Flow operations, due to reaching the 2000 element execution limit, can be adjusted to a lower record count. Additionally, if you have a smaller Flow that isn't at risk of this limit, but you'd prefer it to run against more records; you can easily set the limit to a higher value.
To begin the Flow Operation Template, click the Start Builder button on the corresponding panel as shown below:
- Begin by creating a unique job name for your Automation. This is a required step, because this name will be used to define the Automation you're about to create, within the data-table in the Declarative Builder start page. The job name should be descriptive enough to provide other Admins visiting the start page with context on what the Automation does.
- In the Select Object section, select the object you built your for your Flow operation.
- In the Create Query section, select the field filters that batch will use to narrow your object records down to the ones you want your Flow to execute against.
- In the Select Flow section, select your desired Flow from the picklist.
- In the Flow Specific Fields section you need to select the fields you utilize within your Flow. It is very important that the fields you use in the Flow you selected above, are selected here.
-
The Schedule Job section, your objective here is to schedule when you want your job to execute. Your options are:
-
Schedule to Run Monthly
- You will be presented with a picklist of values 1 to 31. Your selection will determine what day of the month your Automation will run. Standard Salesforce® functionality still applies here - meaning if you select to run on the 31st, and there aren't 31 days in the month, then the Automation will not run.
-
Schedule to Run Weekly
- You will be prompted with a series of weekday buttons, for you to designate on which day(s) of the week you'd like your Automation to run. If you'd like to have the Automation run every day, simply select each button that represents a day of the week.
-
Schedule to Run Monthly
-
The final section is the Batch Operation section. In this section you'll the batch status and batch size.
The default batch status is Active, however, at any time you can set this to Paused. Setting a batch to Paused means the job will not execute when scheduled. Once you set it back to Active again, it will resume running as scheduled. The Batch Size field takes a numeric value, and is used to set the amount of records you want your batch to run. The maximum batch run size is 2000 records, however, for a Flow it is unlikely your Flow will be able to run at that high a limit without encountering the 2000 element per transaction governor limit.
Whether you select to run monthly or weekly, you'll be presented with the Schedule Time section; where we present you with the DateTime -at the moment you selected the Monthly or Weekly option- to show you what date/time configuration your org is configured for - this is because the Automation operations will run in accordance to your Company Settings, not the User's timezone. In this example above, we can see that the User's Company settings are for Pacific Standard Time, even though the user is not in that timezone.
The Select Scheduled Run Time picklist will present you with a list of available time-slots for your Automation. Due to the potential record locking conflicts that can emerge from having multiple jobs running at the same time, we have the time-slots setup in 15 minute increments. Once a time-slot is selected, it is set only for the Automation you built - no other automation will have access to that slot until you delete the Automation.
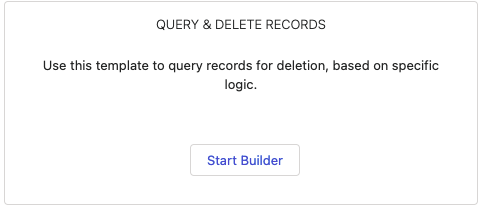
Query & Delete Records
The purpose of this Automation template is to take you through the process of setting up a batch job that would allow you to query for records in a single object, and perform a delete operation on the records that were returned. Great care should be taken when setting this Automation up; since deleting your data can have a material impact on your business operations. A use case for this operation would be to query for records that have already been migrated to a Big Object, and then delete those records - to free up storage in your org.
To begin the Query & Delete Builder Template, click the Start Builder button on the corresponding panel as shown below:
- Begin by creating a unique job name for your Automation. This is a required step, because this name will be used to define the Automation you're about to create, within the data-table in the Declarative Builder start page. The job name should be descriptive enough to provide other Admins visiting the start page with context on what the Automation does.
- In the Select Object section, select the object you want to query your records for the delete operation.
-
Once you've selected the object you want to query against, you'll notice that the Add Filter and Add Row buttons will be ungrey in the Query Filter Logic section and Field Update Mapper section, respectively.
Once you've selected the object you want to query against, you'll notice that the Add Filter button will be ungrey in the Query Filter Logic section.
This Query Filter Logic section is where you build the filtering logic for the records in the object you've elected to query. Additional details on working with building filters can be found in the Filter Builder section below.
-
The final section in this Automation template is the Schedule Your Job section. Your objective here is to schedule when you want your job to execute. Your options are:
-
Schedule to Run Monthly
- You will be presented with a picklist of values 1 to 31. Your selection will determine what day of the month your Automation will run. Standard Salesforce® functionality still applies here - meaning if you select to run on the 31st, and there aren't 31 days in the month, then the Automation will not run.
-
Schedule to Run Weekly
- You will be prompted with a series of weekday buttons, for you to designate on which day(s) of the week you'd like your Automation to run. If you'd like to have the Automation run every day, simply select each button that represents a day of the week.
-
Schedule to Run Monthly
Whether you select to run monthly or weekly, you'll be presented with the Schedule Time section; where we present you with the DateTime -at the moment you selected the Monthly or Weekly option- to show you what date/time configuration your org is configured for - this is because the Automation operations will run in accordance to your Company Settings, not the User's timezone. In this example above, we can see that the User's Company settings are for Pacific Standard Time, even though the user is not in that timezone.
The Select Scheduled Run Time picklist will present you with a list of available time-slots for your Automation. Due to the potential record locking conflicts that can emerge from having multiple jobs running at the same time, we have the time-slots setup in 15 minute increments. Once a time-slot is selected, it is set only for the Automation you built - no other automation will have access to that slot until you delete the Automation.
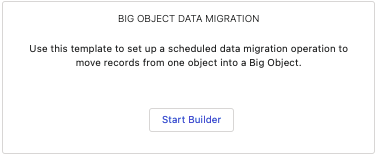
Big Object Data Migration
The purpose of this Automation template is to take you through the process of setting up a batch job that would allow you to query records in your org that you'd like to migrate to a Big Object, for archival storage. This operation does not delete the records being migrated over. A separate Automation would be needed to set that up.
If you have a Big Object setup within your Salesforce® Org, then you will see the Big Object Data Migration template appear in the Declarative Builder templates, as shown below:
- Begin by creating a unique job name for your Automation. This is a required step, because this name will be used to define the Automation you're about to create, within the data-table in the Declarative Builder start page. The job name should be descriptive enough to provide other Admins visiting the start page with context on what the Automation does.
- Select the Salesforce® Big Object you want to be the destination for your data migration.
- Select the Salesforce® object you want to be the source object of your data migration. This represents the object whose data will be migrated to the Big Object.
-
In the Build SObject Query page of the Automation wizard, you'll be setting up the query logic for your source object; which is how your Automation will find the records that need migrating to the Big Object. Additionally, there is an optional step to update the records that have been designated for migration. This is purely optional, however, this is a useful step since you may want to set-up another Automation to delete these archived records.
The Query Filter Logic section on this page functions the same as the other Query Filter Logic sections in the other Automations. Please reference the Filter Builder section below, for a more in-depth review.
The Field Update Mapper section on this page functions the same as the other Field Update Mapper sections in the other Automations. Please reference the Mapper Builder section below, for a more in-depth review.
- In the Build Big Object Mapper page of the Automation wizard, you'll be configuring the mapping operation between the source object you selected and your destination Big Object.
-
The final section in this Automation template is the Schedule Your Job section. Your objective here is to schedule when you want your job to execute. Your options are:
-
Schedule to Run Monthly
- You will be presented with a picklist of values 1 to 31. Your selection will determine what day of the month your Automation will run. Standard Salesforce® functionality still applies here - meaning if you select to run on the 31st, and there aren't 31 days in the month, then the Automation will not run.
-
Schedule to Run Weekly
- You will be prompted with a series of weekday buttons, for you to designate on which day(s) of the week you'd like your Automation to run. If you'd like to have the Automation run every day, simply select each button that represents a day of the week.
-
Schedule to Run Monthly


In the screenshot we have above, you can see we populate all of the Big Object fields. You'll also notice in our screenshot, some of the source object field picklists have a help icon associated with them, while others do not. This icon designates that that destination Big Object's field is either a look-up or a text field - which can be mapped. Care should be given to what value you mapped to these field types on the Big Object.
Whether you select to run monthly or weekly, you'll be presented with the Schedule Time section; where we present you with the DateTime -at the moment you selected the Monthly or Weekly option- to show you what date/time configuration your org is configured for - this is because the Automation operations will run in accordance to your Company Settings, not the User's timezone. In this example above, we can see that the User's Company settings are for Pacific Standard Time, even though the user is not in that timezone.
The Select Scheduled Run Time picklist will present you with a list of available time-slots for your Automation. Due to the potential record locking conflicts that can emerge from having multiple jobs running at the same time, we have the time-slots setup in 15 minute increments. Once a time-slot is selected, it is set only for the Automation you built - no other automation will have access to that slot until you delete the Automation.
Filter Builder
- To create the filter criteria, start by clicking the Add Filter button in this section.
- You will be prompted to select the field you'd like to use for your filter criteria. At present, there is a hard limit of 10 fields for this operation.
- The Operator selection tells us what to do with the field that you designate for the selected field. The Operator picklist values vary according to your select field's data type
- Once you've completed your selections for these two picklists, click the Save icon to save the filter configuration you built.
- After saving your selections, the row will become grayed out, preventing any changes to your selections. If you'd like to edit the filter, clicking the green pencil icon on the right will allow you to edit your filter. If you'd like to completely remove the filter, simply click the red delete icon on the right.
-
All Conditions Are Met:
- This is an AND operation, so each filter is considered. In the example above, you can tell this would not work, since that Account Rating field we're using cannot be both NULL and Cold.
-
Any Condition Is Met:
- This is an OR operation, so either of the filters have to be resolved to TRUE in order for this filter to work. In the example above you could get away with an OR operation; however, for the purposes of this documentation the aim was the final option.
-
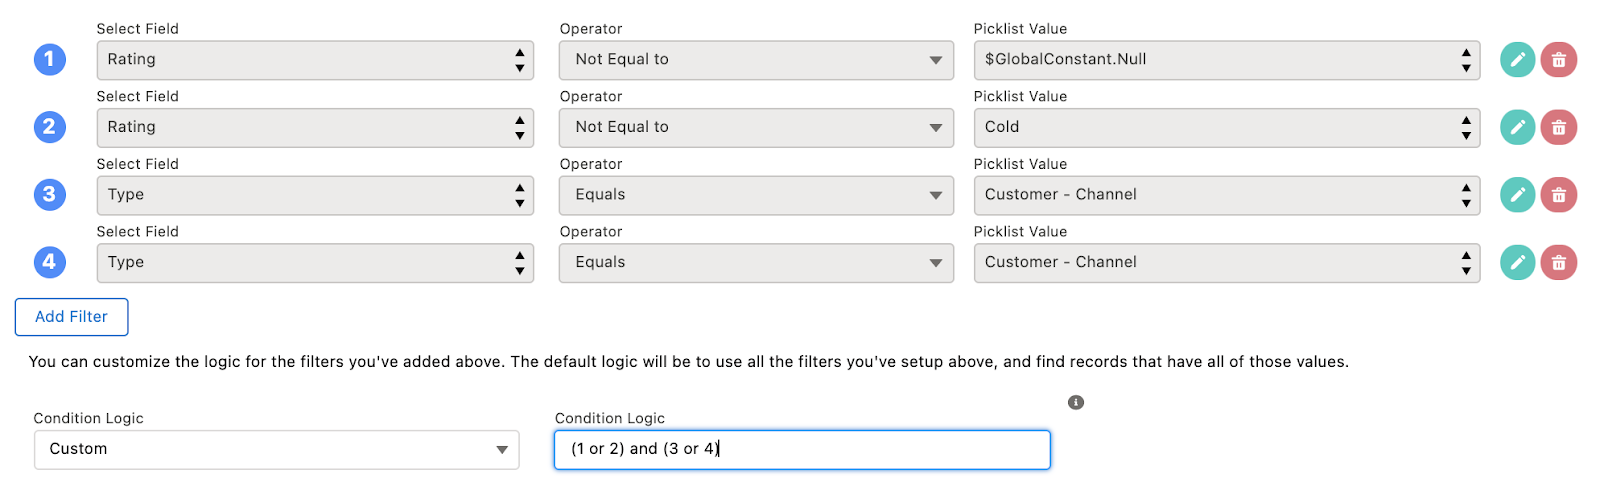
Custom:
- Custom logic functionality is prolific throughout the declarative features (like Process Builder and Flow) within the Salesforce® platform - and we built our custom logic operations to mirror that behavior. When you select this option, an input field, Condition Logic, will appear to store your custom condition logic.
- In the screenshot above, you can see that we set-up (1 or 2) and (3 or 4) - the parenthesis are important, failure to properly put parentheses around OR conditions will result in filters that may not meet your expectations. All of the role numbers within your filter must be present in your Custom Condition Logic statement.

The field you select will determine the operator and input values available to you. In this example, we're using the Account object, and will be selecting the standard picklist field Rating.

Checkbox fields are intentionally grayed out, because the only options available are TRUE or FALSE, and you'll be designating that in the Field Selection portion of the filter.
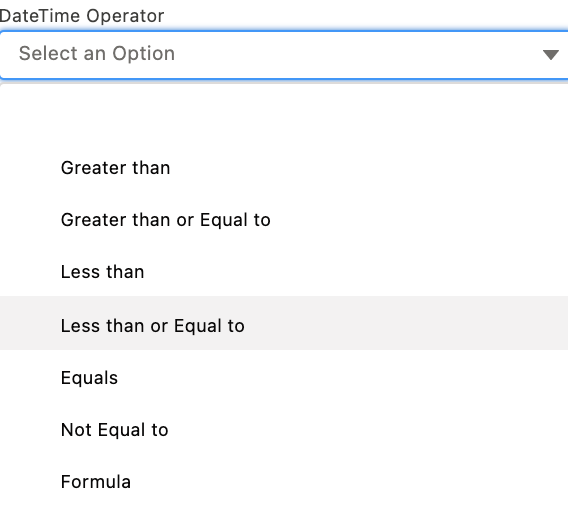
The Operator for Date and Datetime fields will also have an option for Formula. Selecting this operation will allow you to confirm formula logic for enhancing your filter logic for the Date or Datetime field. More details on the Formula Builder can be found in the section labeled Formula Builder below.

If there are 2 or more filters, within your configuration (like we have above), then the
Custom Logic
picklist will appear. The operations within this picklist are as follows:Mapper Builder
The Mapper section of the Automation templates allows you to set-up logic for the following use-cases:
-
Updating Records:
- The Mapper section will be used to define what fields you want updated, and what values you want in those fields.
-
Creating New Records:
- The Mapper section will be used to define what field you want populated with values, upon creation.
- Any required fields you have in your selected object will appear first, and cannot be ignored.
- To begin setting up the Mapper, simply click the Add Row button.
- The Select a Field picklist will present you with the fields available for mapping. When you select a field, that field will no longer be present for selection again in the Mapper -which makes sense, since you cannot map two different values to a single field.
- If you are mapping child records, you may be presented with a Mapping Operation of Parent Field Value. This means you can populate your child records with the value from its parent record. This option is dependent on the field data type you selected, and your options for mapping the parent field value options will only be those parent fields that share the same data-type of the child field you selected.
Like the Filter Builder, when you select a field for mapping you will be presented with a series of picklists to provide instructions for how that field should be populated. In the example above, the Mapping Operation is for a Picklist data type, therefore this picklist is grayed out since you'll be designating a value for that field.
In the example above, the LastName field was selected for us, because in the example we are creating Contact records for the Account. Since LastName is required for Contacts, it's prepopulated for us, and it's grayed out -so you cannot change it. The fields presented in the Select Parent Field picklist represent all the fields on the parent object that share the same data-type as the child field selected.
Formula Builder
When building out logic for your Date or DateTime fields, you will be presented with a Formula picklist option. You will be presented with different formula options, based on the Automation context you're in - Filter logic and Mapper logic share similar functions, but also have unique options only available to them.
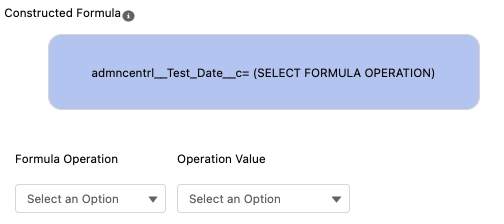
When you select the Formula option, you'll be presented with a modal that will show the field you selected. In this example, you can see we have a test date-time field selected.
The Formula Operation picklist will present you with the options available to you, based on the field you selected and the context you're operating within.
-
Filter-context:
- If you are using the Formula Builder within a Filter operation, then you will be presented with Salesforce® standard "Date Literal" operation.
-
Mapper-context:
- If you are using the Formula Builder within a Mapper operation, then you will be presented with options that are fewer; however are very specific to creating/updating records.
- An example would be AddDays(), where the date/date-time field will be able to have days added.
The Operation Value is a picklist that appears within the Filter-context. You'll be presented with filter options that will determine how we use this date/date-time field in your Automation's operations. Values here will mirror the other filter options you have available to you, and are specific to date, date-time fields.
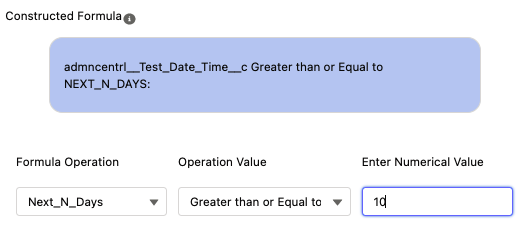
The Enter Numerical Value section appears depending on the operation you've selected within the Formula Operation section. As you see in the example above, with our Test_Date_Time__c field, we selected Salesforce® Date Literal option of Next_N_Days. This date literal requires a number value to fill the N value. The logic being built above for the Formula Builder is that we are only interested in records where the Test_Date_Time__c field value is greater than or equal to TODAY + 10 days. More details on Salesforce® Date Literal logic can be found here.

Saving the formula configuration will take you back to your filter, or mapper, and present you with the operator and value you've built. In this example, we see that the Test_Date_Time__c logic is greater than or equal to Next_N_Days: 10. If this is what you expected, click the Save icon to complete building the filter.